9/3/2020
Audience Research
Audience Research
To help me better understand the audience characteristics I referred back to the research I conducted for my Unit 12 report, where I had an in depth look into the BBFC age ratings. Thinking of what will be in my animation (and what I plan to put into it if I continue it in the future), I think that my animation will be for audiences of 18 and over, as it will contain strong bloody violence and gore, as well as strong horror and strong language when suitable. As such, I will make sure to add a content warning before the animation and/or in the title.
The research from my unit 12 report is colour coded to allow for easy comparison of the rules between each rating.
The research from my unit 12 report is colour coded to allow for easy comparison of the rules between each rating.
Language:
Sexual content:
Scary scenes:
Discriminatory behaviour:
Dangerous behaviour:
Violence:
Sexual violence:
Other things I could include with an 18+ rating are portrayals of sexual activity and other sex related themes, as well as discriminatory language and behaviour. Sexual themes are something I will no the including however, as my main character is quite young and therefore would know nothing of these things, unless she had experienced some abuse in the past, which she has not. And discriminatory language and behaviour, aside from the insults aimed at my main character herself, are something I will also be avoiding, as not only would it make no sense in the context, but it is something i feel strongly against.
The primary research I conducted during Unit 12 was very useful as well as it helped me learn what people found suitable for kids and what not, and therefore how far I would have to go for the animation to not be suitable for kids anymore, which was my goal, as it is part of my theme. As I had mentioned in my report, I gathered that the biggest thing that sets "kids gore" and "adult gore" apart is blood. Many kids animations will include scenes of harm to the characters, however they will refrain from using any blood at all, and this helps them pass under the radar. Therefore I know that to make sure my animation is not suitable for kids anymore, it should include scenes with heavy amounts of blood.
3/3/2020
Secondary Production research
To help me create a more fluid and smooth animation, I wanted to look into the 12 principles of animation again. I found a great video online that explained the principles with comprehensible explanations and examples and so I was not only able to create a good sheet with the most important key points, but also learn something simply by remembering the video.
5/3/2020
Experimentation with Adobe Animate & the 12 Principles of Animation
Principle 1: Squash and Stretch
This Principle is based on how to portray mass in an object using squash and stretch. I showed this by creating a simple bouncing ball animation, where squash and stretch is crucial to making the ball seems bouncy.
This principle is based on making an action clearer and more realistic by anticipating it. I showed this by creating a simple jumping animation, where the character squats before jumping.
Principle 3: Staging
This Principle is based on guiding a viewers eyes to what is happening. I showed this by creating a simple animation where the faces eyes tell the viewer where to look, so they don't miss the explosion.
Principle 4: Straight Ahead & Pose to Pose
This Principle is based on the differences of Straight ahead and Pose to Pose and when it is best to use them. I showed this by creating a simple animation where the character is animated using pose to pose, and the fire is animated using straight ahead.
Principle 5: Follow Through & Overlapping Action
This Principle is based on how to animate parts of a character that move differently. I showed this by creating a simple running animation where the ponytail moves differently to the body.
Principle 6: Slow in & Slow out
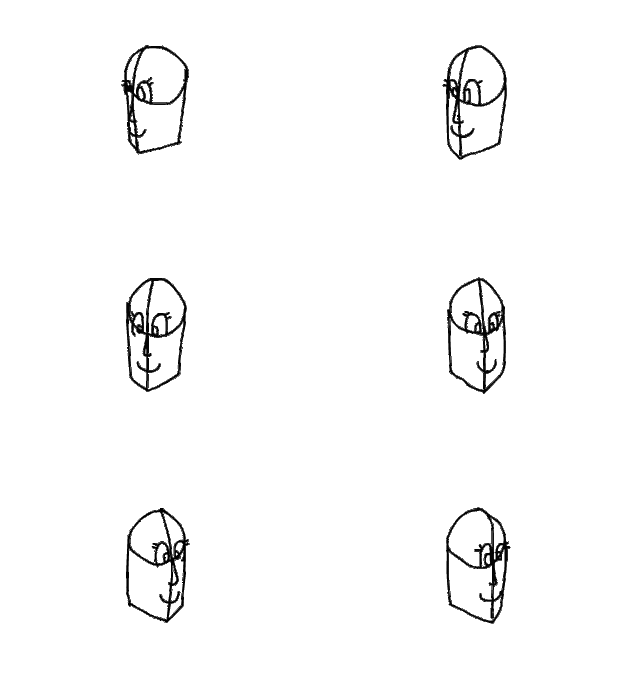
This Principle is based on how to make a movement look more human. I showed this by creating a simple head turn animation where the movement is faster in the middle of the action.
Principle 7: Arcs
This Principle is based on getting actions to look more realistic. I showed this by creating a simple waving animation where the characters arm moves in an arc.
Principle 8: Secondary Action
This Principle is based on adding emotions to a main action by supporting it with secondary actions. I showed this by creating a simple headbanging animation where the hands feet and hair bring emotion and context to the main action.
Principle 9: Timing
This Principle is based on the differences between animating on ones and twos and when its best to use them. I showed this by creating a simple worm animation where the top one is animated on ones and the bottom is animated on twos.
Principle 10: Exaggeration
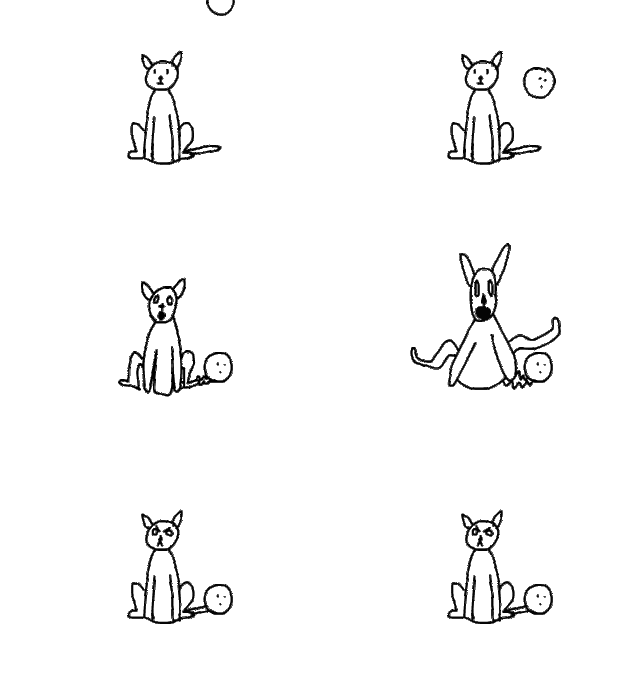
This Principle is based on making a reaction clearer by exaggerating certain frames. I showed this by creating a simple animation where a cat has an intense reaction to a bowling ball.
Principle 11 & 12: Solid Drawing and Appeal
These Principles are based on Character design, and therefore were not animated in this practice. I showed this by drawing a character who has a 3D form and cute, Chibi-esque body proportions.
10/3/2020
Experimentation with Classic tweens and symbols
To support what I learned from the 12 principles of animation, I wanted to look in to some Adobe animate tutorials to see what they could teach me. As a result I managed to find a video that taught me two very useful things about classic tweens and symbols in particular.
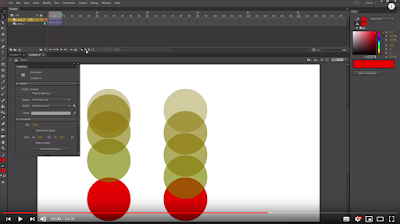
First I learned how to use tweens to do slow in slow out, by adjusting the classic ease setting in the properties of a tweened keyframe. By setting the first frame to 100 and the last to -100, I was able to easily and quickly add slow in slow out to a ball. I also added a second ball without slow in slow out below for comparison.
Next I learned how to easily animate a character moving across a scene by making them a graphic symbol and double clicking them. This takes you to a separate timeline where you can animate just the character itself. Then if you return to the main timeline, when adding frames to the characters layer, it automatically has the characters animation playing. Now that hes a symbol as well, he can easily be found in the library and dragged on the canvas, animation and all.
Secondary Artistic Research
As I had the idea for my FMP quite a while ago, I had already designed an art style and the characters for it, however it was still really useful for me to create a sheet and write down where I took inspiration from, and why.
After this I also created a sheet detailing the differences in skeletal structure of the different art styles, as this helps to see the similarities to mine.
3/3/2020
Narrative Research
For the narrative it was important to me that I roughly follow the story of the original Alice in wonderland book, but obviously in a much darker way. To help me with this I looked into old Grimm's fairy tales and how they were changed in Disney adaptations, as this is useful in learning how to do the opposite.


